Creating a twitter bot using Google sheet
Introduction: Creating a twitter bot using Google sheet
PLEASE READ Twitter Bot Etiquette BEFORE PROCEEDING.
What is a Twitter Bot?
A Twitter bot is a type of bot software that controls a Twitter account via the Twitter API. The bot software may autonomously perform actions such as tweeting, re-tweeting, liking, following, unfollowing, or direct messaging other accounts. Wikipedia Bots date back to the 1980s, when programmers using a service called Internet Relay Chat began making user profiles to serve narrowly defined, pre-programmed functions. The human user could ask the bot for date and time, for example, and the bot could provide. Soon, they were serving essential internet functions, like providing backup to Wikipedia’s human editors (bots can flag possible copyright violations, or add links to stories) and trawling sites to for Google and its search engine.
As the bot’s domain has expanded, so have the tool for its creation. Many bots are still built with basic programming languages, like this DIY bot made with NodeJS that will respond to text messages. But the most sophisticated bots are actually artificial intelligence, cannibalizing existing information, running it through a neural network, and spitting out novel ideas or images based on what it’s learned. A recent example includes this bot that turns words into strange, grainy, and theoretically related images.
Five things to know about twitter about bots.
It’s no secret that there are bots on Twitter. But how do bot accounts — which automatically create tweets without direct human oversight — actually affect the mix of content on Twitter?
A new Pew Research Center study, conducted over a six-week period in the summer of 2017, examined 1.2 million tweets with URL links to determine what share of links were posted by bots on Twitter. The study identified bots using Botometer, which learns patterns from hand-classified account data produced by trained experts.
To count how many times human and bot accounts shared links to particular websites, we wrote a computer program to follow each shared link to its destination. Then we isolated the 2,315 most commonly shared sites with meaningful content and classified the kinds of content that appear on those sites.
Here is a link to five key takeaways from Pew Research.
References
General Setup Instructions
I recommend that you create a separate Gmail account for your bot so you can have everything apart from your personal account.
The following steps are general for any type of bot you want to create. To get started, make a copy of Zach’s spreadsheet and save it in Google drive. It CAN NOT be saved on your desk top because it will not work, then proceed through the steps below.
Tutorial
1. Create a Twitter account for your Bot
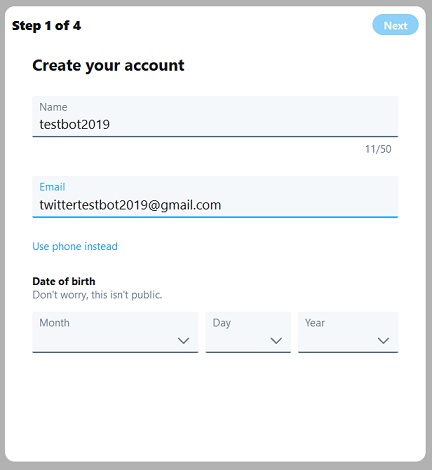
Go to Twitter and sign up for a new account. You can use name you created for the bots Gmail account, go ahead and confirm the account with the email address and do some of the basic profile setup.
After you click on the “Sign up” tab it will ask you add a phone number, you can skip this part for now but you will need to do it later on in the steps. You can also click where it says “use email instead” and use the Gmail you created for your bot.
2. Open your Google Sheet
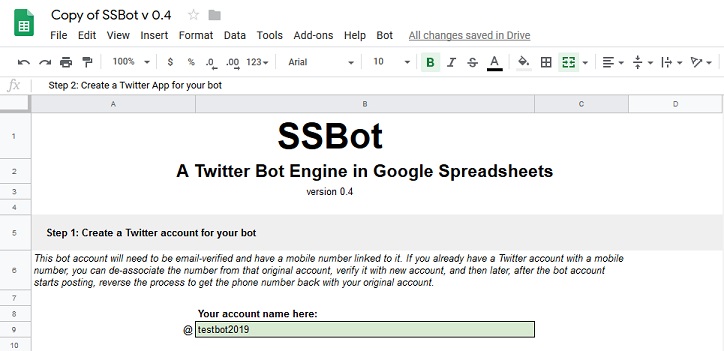
Enter your account name in your Google sheet under Step 1. Google sheets will automatically save so you don’t have to worry about lossing any information.
3. Apply for a Twitter developer account
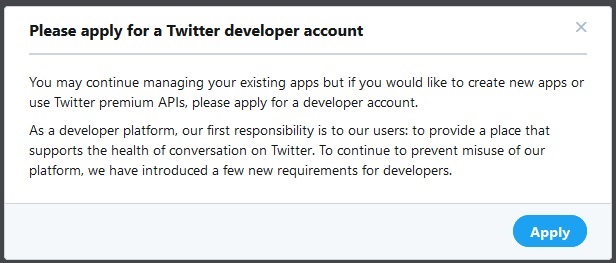
Go to Twitter Apps click on the “Create App”. You will have a pop-up asking you to apply for a developer account, go ahead and apply.

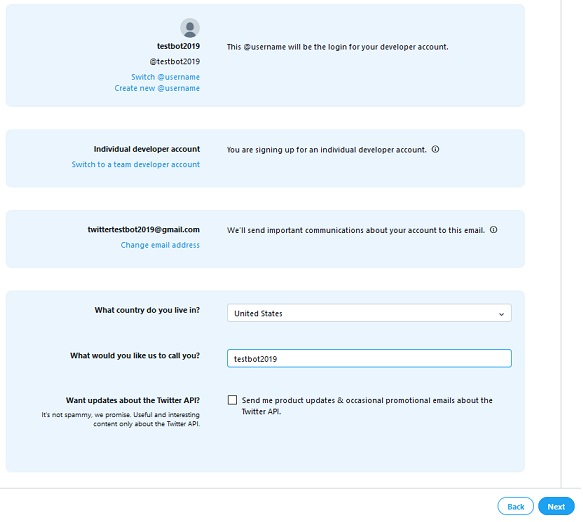
The next page you’ll be asked to select a primary use for your Twitter API, you can only select one. I would just select “Student” then click next. On this step is when you’ll need to add a cell phone number, after verifying your number type in the code that was texted to you. You will be asked “What country do you live in?” and “What would you like us to call you?” you can put in whatever you like.
Next, you’ll be asked “How will you use the Twitter API or Twitter data?”. You will have to type in a minimum of 200 characters in this box.
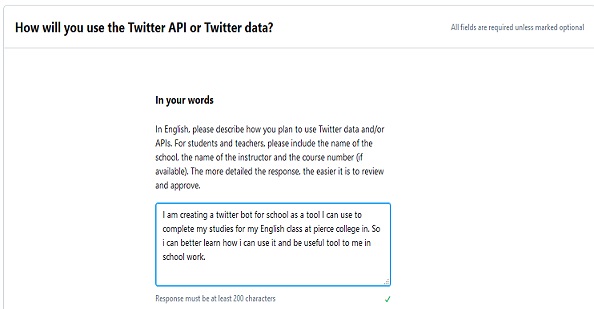
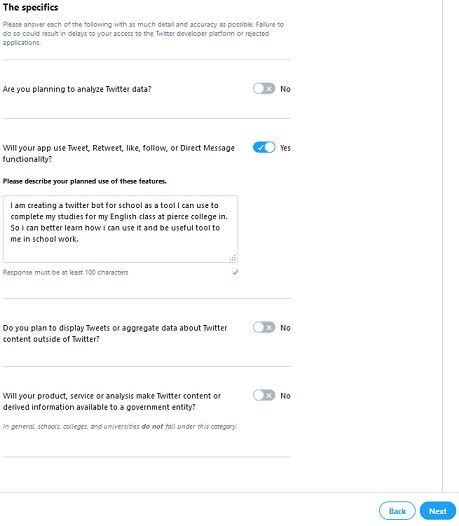
For “The specifics” part select NO for “Are you planning to analyze Twitter data?”, Yes for “Will your app use Tweet, Retweet, like, follow, or Direct Message functionality?” and just copy and paste the same thing you wrote in the first block, and select no for the last two question and click next.
The last step will be is to verify that everything you just did looks correct click Next, if not just click on the back tab at the bottom and make the needed corrections. If everything is good click on “Looks Good” and accept the “Terms” and “Submit” the application.
You will get an email requesting you to confirm you email address. After confirming it might take some time until you’re able to create an app. So just keep checking the Bots email account.
4. Create a Twitter App for your Bot
This application (“app”) is the method that your spreadsheet will use to talk to Twitter. It’s possible to use Apps for multiple bots or accounts — in fact, this is how they’re designed — but I like to make one for each bot account so that if one gets suspended the others aren’t necessarily in jeopardy at the same time.
Go to Twitter Apps and hit the “Create New App” button. Fill out the form to give your app a name, description, and website. These can be quite simple and can always be changed later. The App’s name needs to be unique, so you can name it the same it based on your bot’s name, but if you get an error saying that name has been taken just change it.

In the App description just type a short explanation of your bot. For the Website URL you can use your bots name and just add a “.com” at the end. Leave the Enable sign in the box unchecked for now and leave the “Callback” field blank for now.
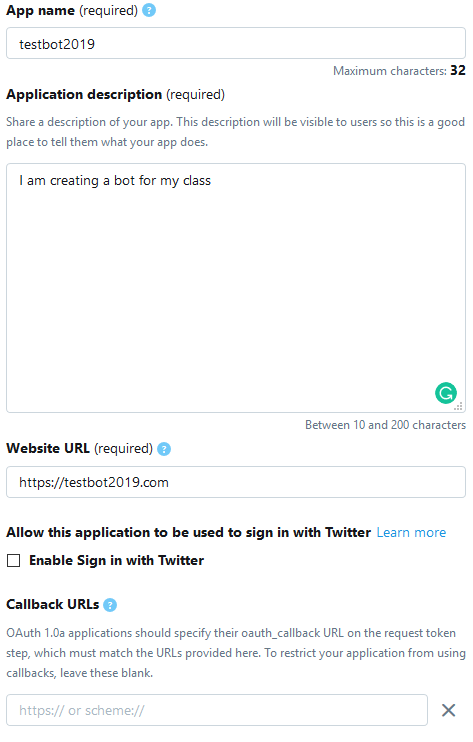
You can leave all the other URLs blank because it’s not required. For the Tell us how this app will be used you can use the same description that you used before. After that click Create.
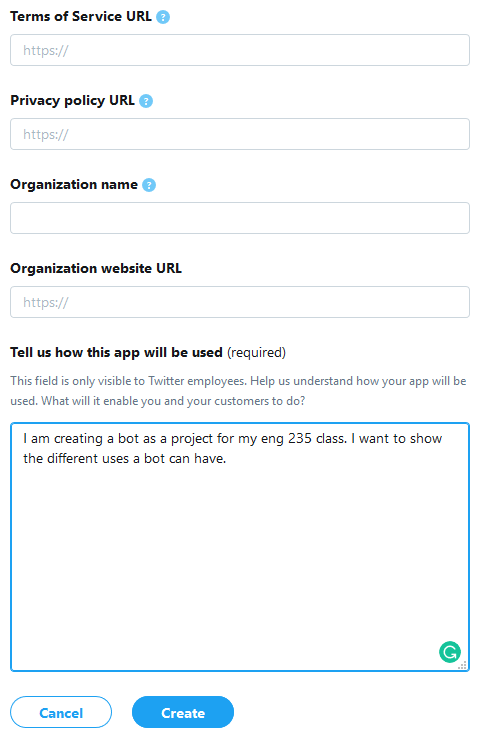
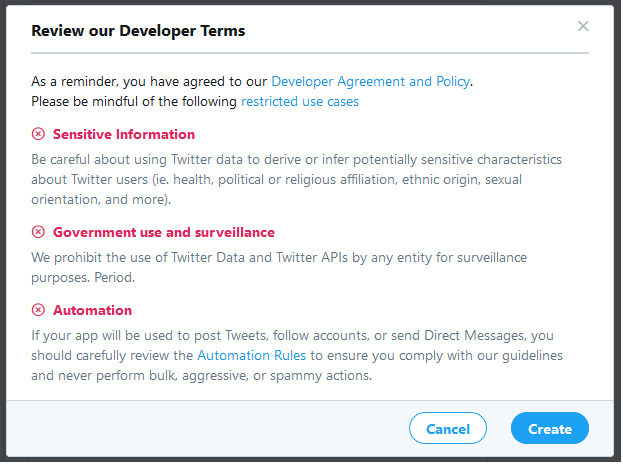
You will get a Developer Terms read the information and click Create
5. Complete App Setup and Enter Keys into the Spreadsheet
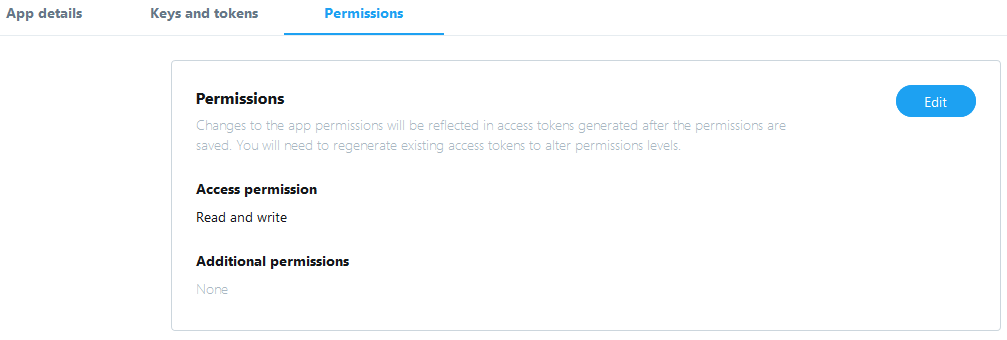
You App has four tabs: APP Details, Keys and Access Tokens, and Permissions. Under Details, make sure that the app’s access level is set to “Read and Write,” and if not, click edit and change it.
Under the Keys and Access Tokens tab, use the button to “Generate” . This will authorize your app to interface with your account. (I know, it seems redundant.)
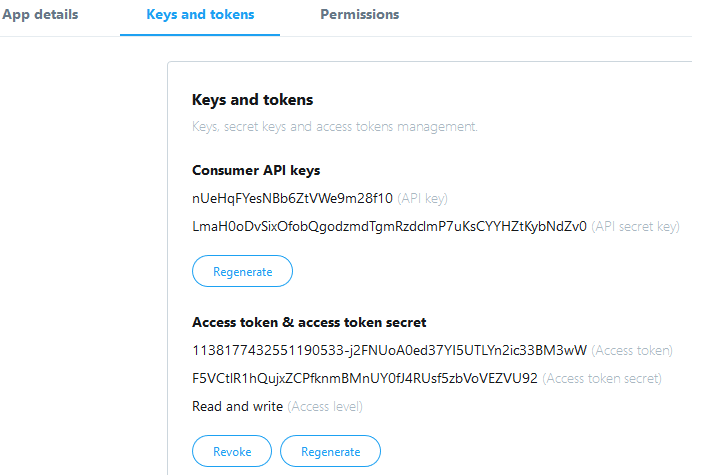
Then, copy and paste the Consumer Key (API Key) and Consumer Secret (API Secret) from that tab into the green cells under Step 3 in your spreadsheet.
Note: The Consumer API Key and Consumer Secret are not the same thing as the Access Token and Access token Secret.

6. Locate your Google Spreadsheet’s “Project Key”
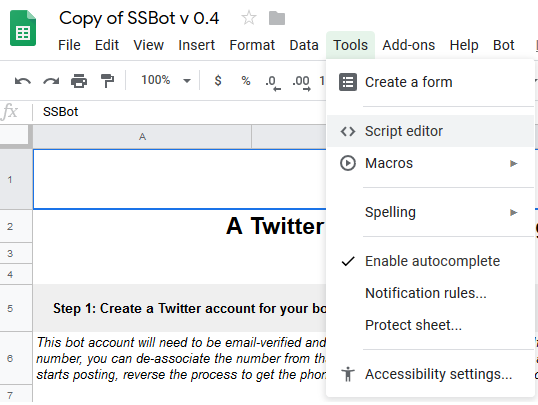
This is your spreadsheet’s unique ID within Google. To find yours, first open “Tools-> Script Editor…” to bring up the Script Editor.
In the Script Editor, open “File-> Project Properties,” and locate your “Project key” in the table that you’ll see there.
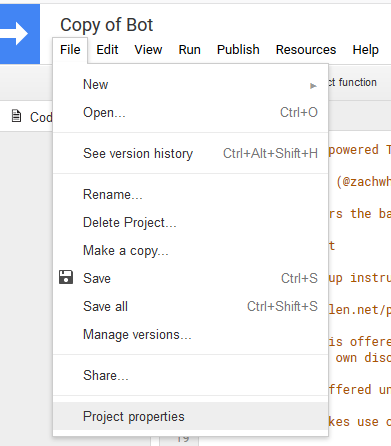
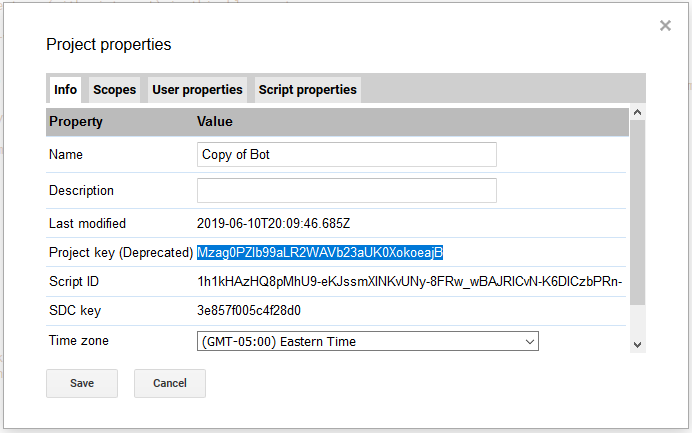
Copy and paste that Project key into the green cell under Step 4.

7. Add “Callback” Value to Twitter App
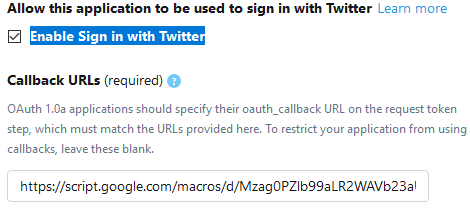
After completing Step 4, the red cell under Step 5 should automatically change to include your Project key as part of a URL.

Go back to your Twitter App’s Detail tab click edit and paste that URL into “Callback URL” field. Also check the Enable Sign in with Twitter box.
8. Select a Data Sheet and Generate a Preview of its Output
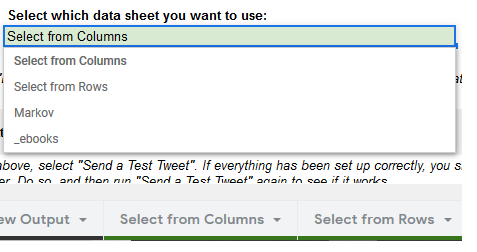
Select a data sheet from the drop down under Step 6, it would be best to Select from Columns or Rows for now. If you leave it on eBooks you will have a connect issue.
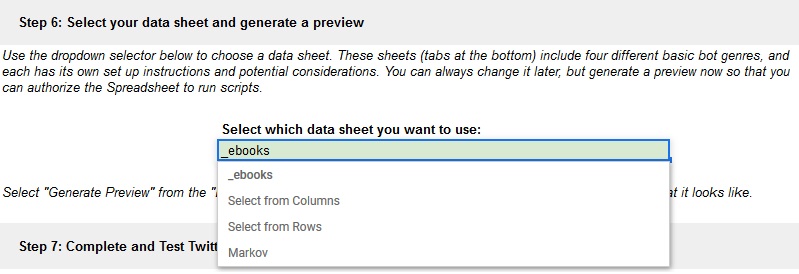
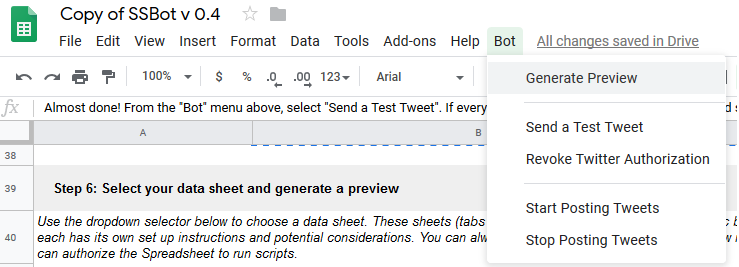
From the “Bot” menu in your Spreadsheet, select “Generate Preview”. (Each of the four options has specific setup instructions below, but they’re all pre-populated with sample content for this setup step.)
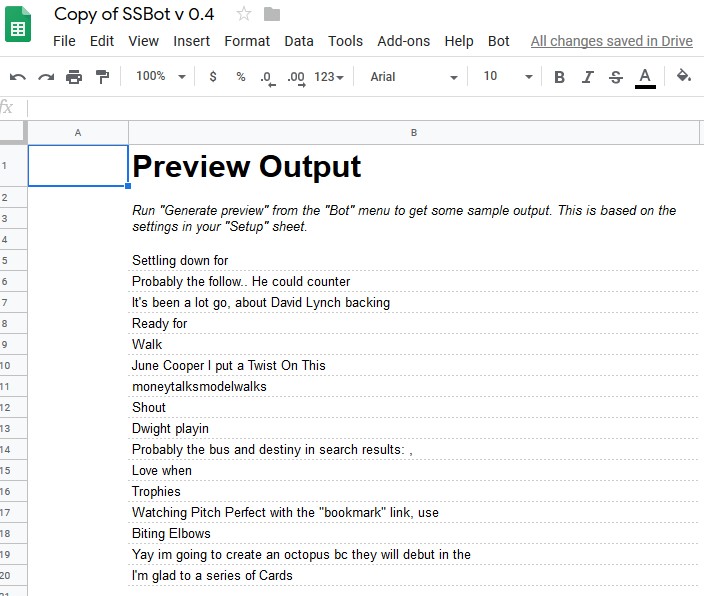
At the bottom of the spreadsheet switch to the “Preview Output” sheet to see 15 sample tweets generated from the selected data sheet. You can edit these data sheets to your own content now, or you can wait until the rest of the setup is complete.
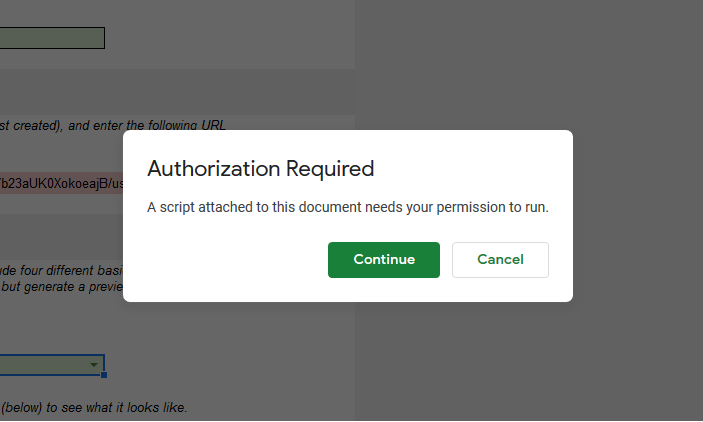
Generating this preview will require you to authorize the scripts in this spreadsheet, so you should agree to grant it permission if prompted.
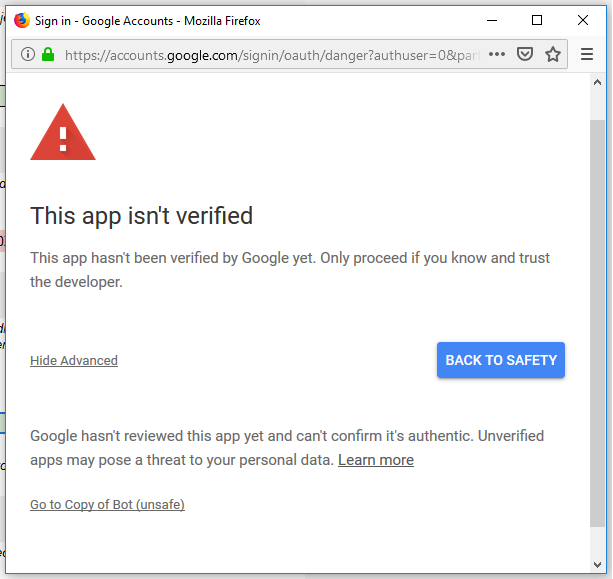
At this point you’ll get a pop-up saying App isn’t verified just click on Advance and the on Go to Copy of Bot (unsafe) and on the next pop-up Allow. Don’t worry your computer will not blow up on you. It is need so the spreadsheet can talk to your twitter bot.
9. Test Twitter Authorization
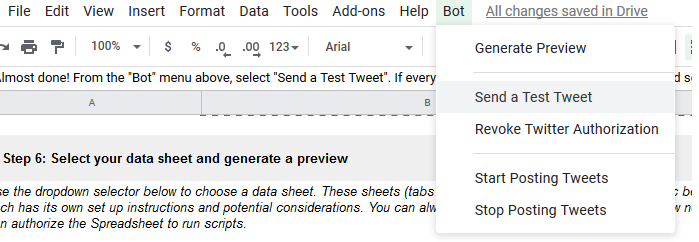
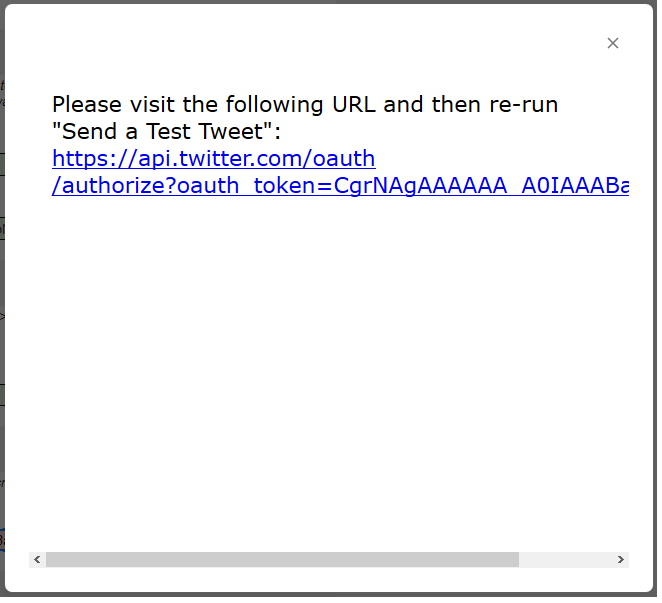
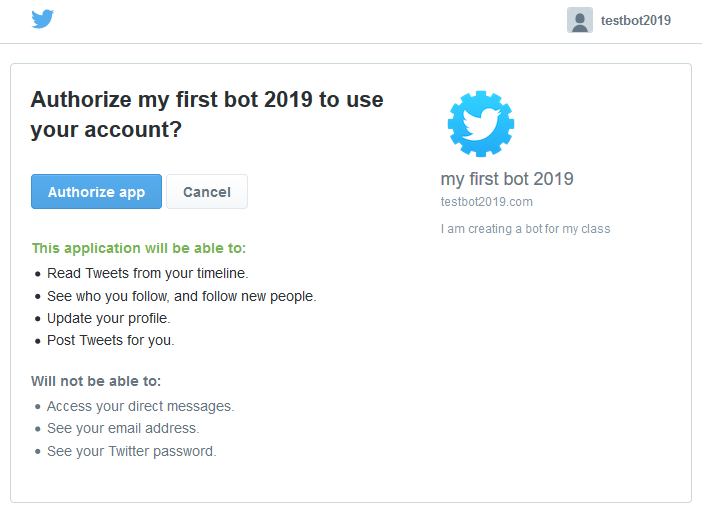
You’re almost done! From the “Bot” menu above, select “Send a Test Tweet”. If everything has been set up correctly, you should see a pop up inviting you to authenticate your app with your Twitter account. It’s pretty easy. Follow the link, click authorize, then close the new tab when it says. “Success!”
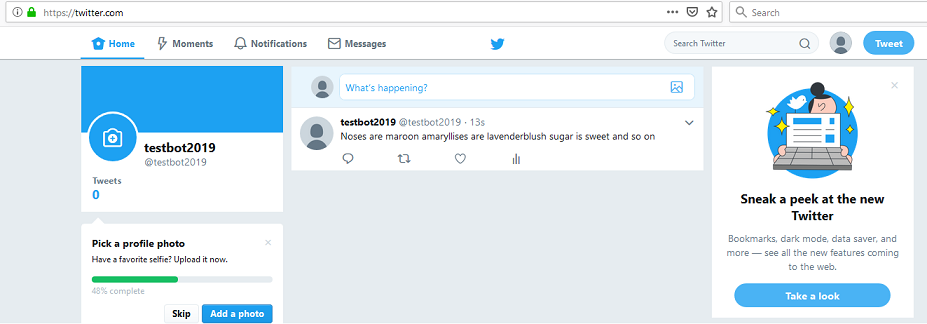
Re-run Send a Test Tweet, and check your time line. Hopefully it worked!
10. Set Post Timing
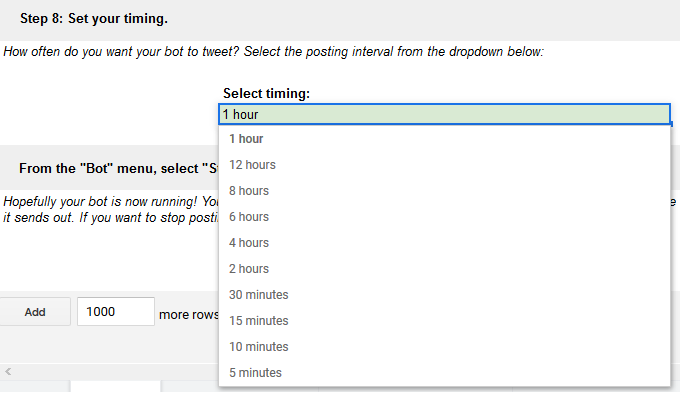
Decide how often you want your bot posting, and select an option from the drop down under Step 8. Unfortunately, these are the only options, and the actually timing is to some extent subject to Google’s whims. You won’t, for example, be able to specify your bot to post at exactly 10:34 every day.
11. Start it up!
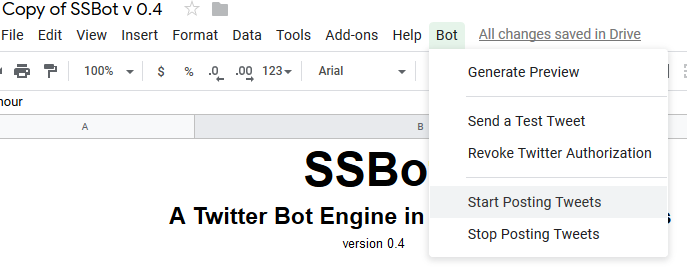
If everything has gone well so far and your data sheet is populated with your content, then you’re ready to start sending out tweets. Select “Start Posting Tweets” from the Bot menu in your spreadsheet. If ever you decide to stop your bot, then use the “Stop Posting Tweets” option under the Bot menu.
You can change the data sheet selection and edit the data sheet contents without stopping the tweeting.

It will simply use the updated setting whenever it next attempts to send a tweet. You will, however, have to stop and restart the posting if you want to change the timing.
Example
I have a bot called RobobotPR20 running that’s tweeting random “Roses are red” poems