Organizing Google Drive
Lesson Abstract
If you are looking at this tutorial, you are probably trying to organize your Pierce College course work in Google Drive, making it easier for you to navigate through all of the files.
Lesson Objectives/Outcomes
Students will be able to navigate through Google Drive files.
Students will be able to create separate folders to organize files.
Materials
- Internet access
- A device that can access Google Drive
Overview
Google Drive is an online cloud storage where users can save files and documents. It is useful to learn how to navigate Google Drive for organizing college course work, due to all the different courses and assignment types received throughout a students’ time at college. The purpose of this tutorial is to take make navigation through Google Drive easier and simpler by showing you how to organize your files and folders. As students we also know the difficulty of organizing course work/assignments and the clutter that gets built up in the drive from having multiple classes.
Lesson Steps/Components
Sign into Google Drive
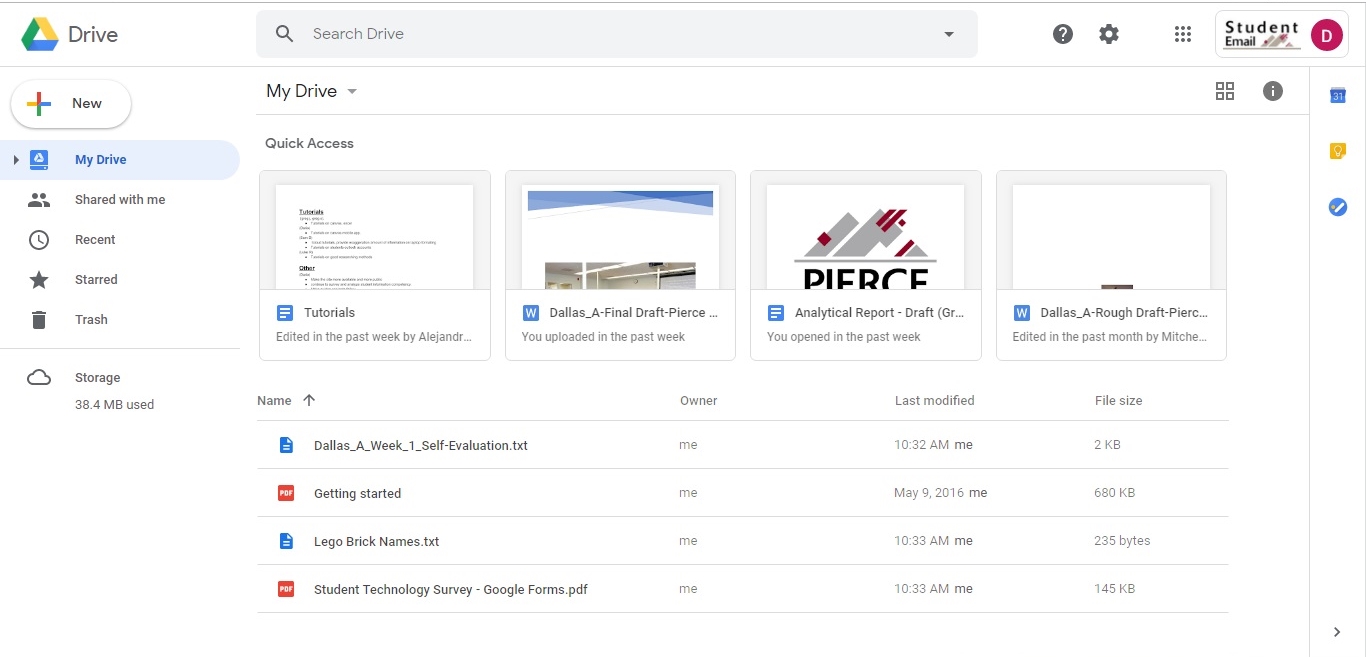
Creating Folders
Method 1
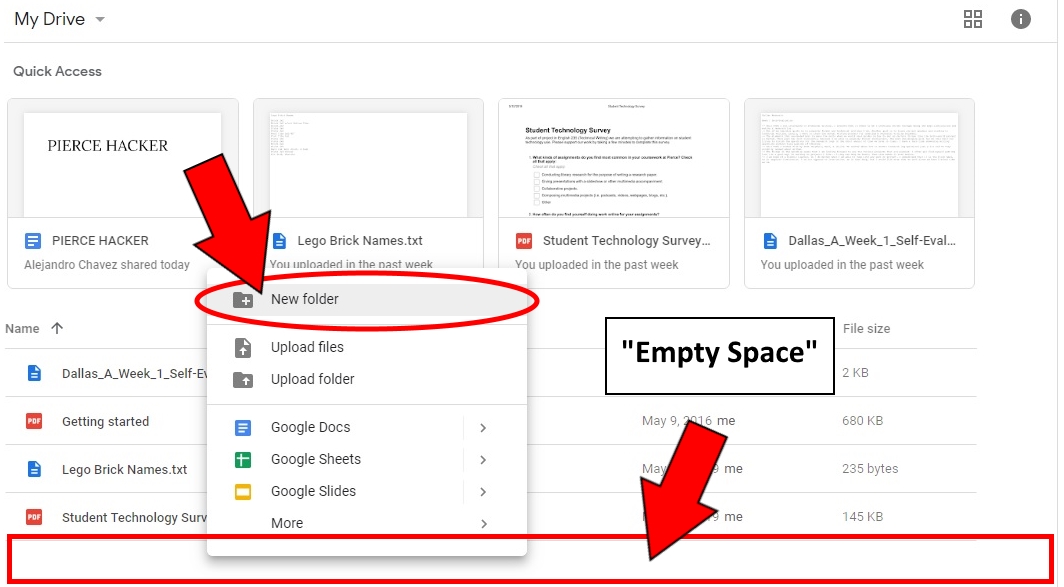
- Right click in empty space below your files and folders.
- Choose “New Folder”.
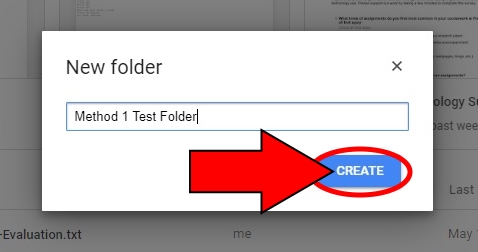
- Give it a name and click “Create”.
Method 2
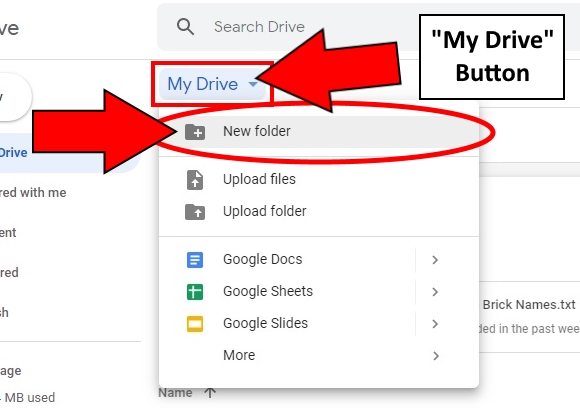
- Click the “My Drive” button located in between the “Search Drive” field and “Quick Access” title, to expand the drop-down menu.
- Choose “New Folder”.
- Give it a name and click “Create”.
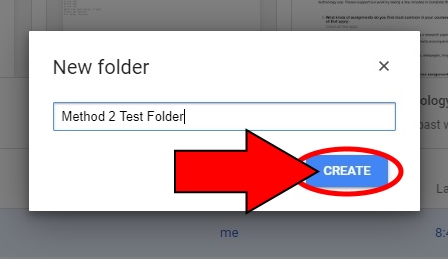
Organizing Files and Folders
Method 1
- Right click on one of your documents and choose “Move To”.
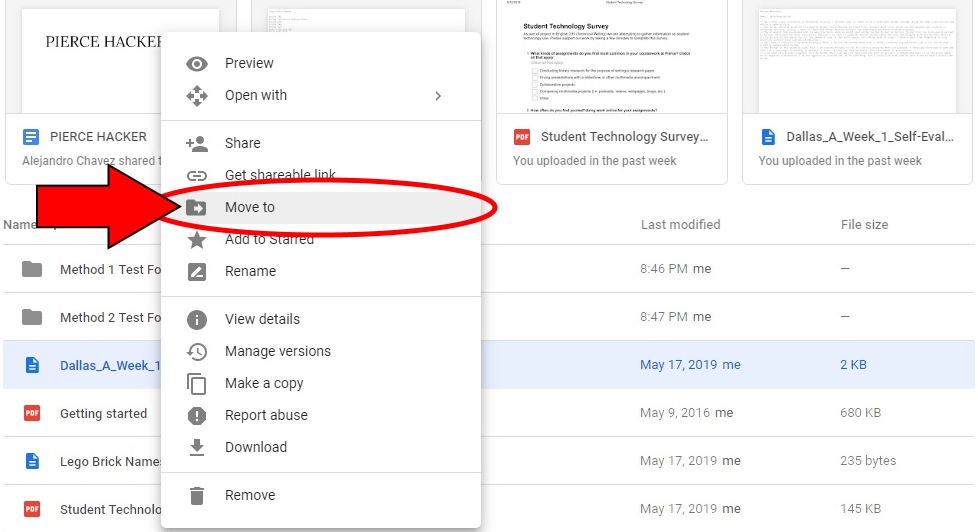
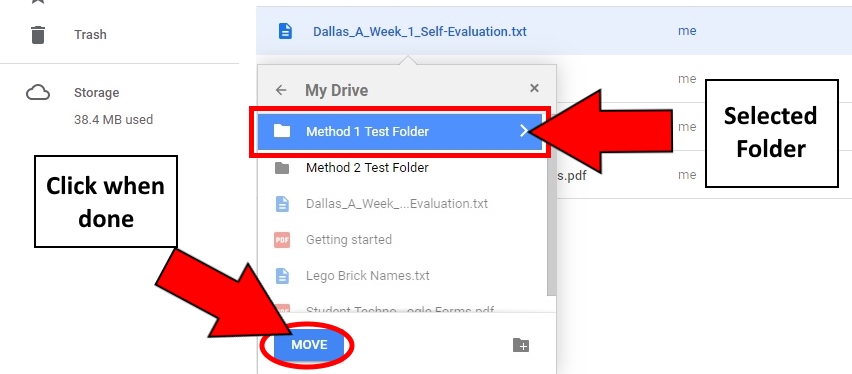
- A pop-up menu appears title My Drive with a list of your files and folders if you have any.
- Select a folder that you would like to move the document into and click the “Move” button.
- If you don’t have any folders, skip to Method 2.
- In the bottom left corner of your browser window, a small notification will appear, confirming the move.

Method 2
- Left click and drag the file you wish to move and drop the file into the folder of your choosing.
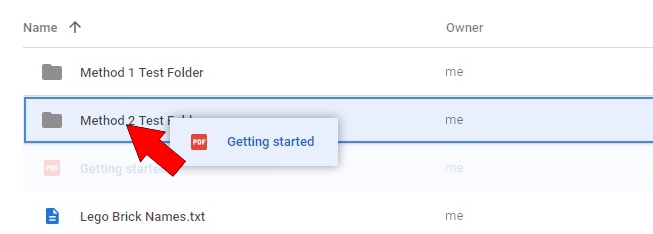
- The bottom left corner of the browser window will have a notification confirming the move.

Method 3
- Right click on one of your documents and choose move to.
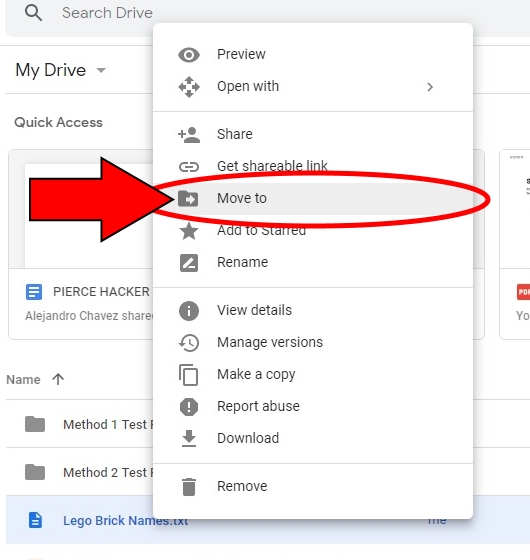
- You’ll get a pop-up window title My Drive.
- Select the “New Folder” button located in the bottom right
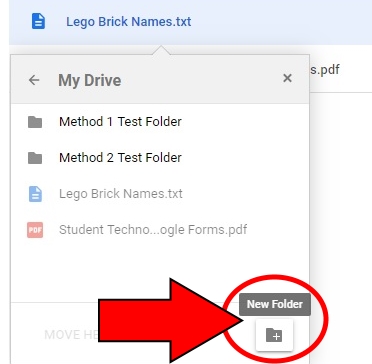
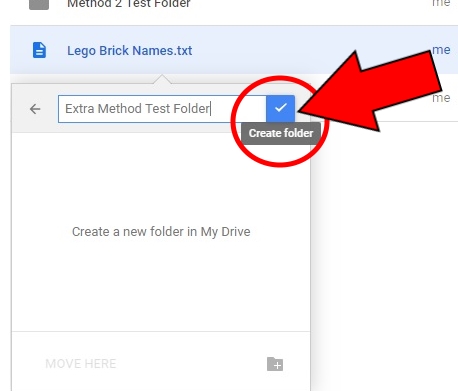
- Name the folder and click the check mark button to create the folder.
- Click “Move Here” to move the file to the newly created folder.
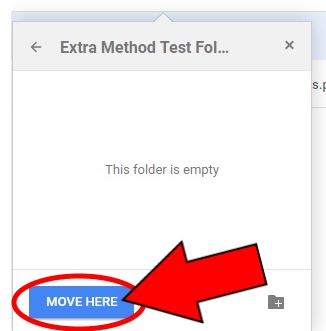
- A notification confirming the move will appear in the bottom-left corner of the browser window.
